
This summer, I have learned how to make and use chalk paint. It really is remarkable stuff – easy to make and no prep needed before you start painting. I found a recipe here. I used the calcium carbonate recipe because you can use it with virtually any paint, including satin finishes and those with primers. The calcium carbonate will turn the paint into a flat finish.
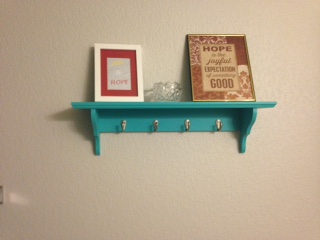
I started with an old filing cabinet. I didn’t really care if it didn’t turn out well, so it was the perfect piece to learn on. Then I moved onto my guest bathroom. I painted the cabinets, an old dresser, a shelf, and the metal edges of a pair of mirrors. I really love how this room turned out!


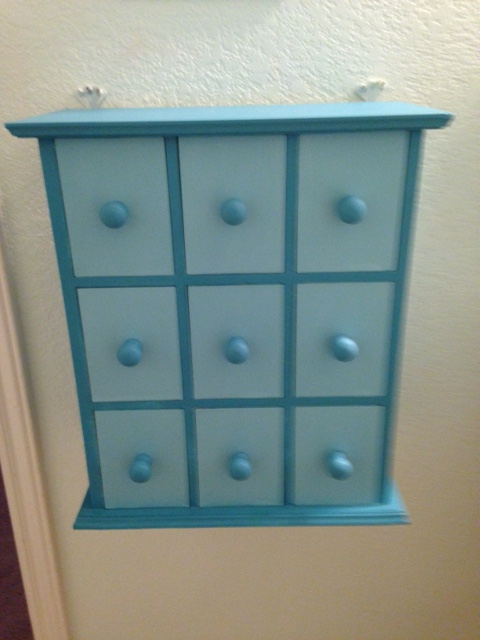
Here’s an old bathroom cabinet my sister gave me 15 years ago.

With the waxy white finish, I have found it best to sand this a little to help the paint adhere better.
My first plan was to use several different shades of blue for the drawers and handles. I didn’t like how it was turning out, so I took the color I used on the main part and lightened it. You can still see some of the other darker blues I used in this picture. This was taken after only one coat!

What’s a good home project without some sort of mistake? Or is that just me? I set my paint bowl on the drawers, not realizing there was some darker blue paint on the bottom. Covering this mistake only took one coat, even though I was using a lighter color.

Since I do not distress my furniture, I use 3 coats. If I were to distress, I would probably only need 2 coats. The paint takes about 15 minutes to dry between coats. Then it is waxed. I use Minwax Paste Finishing Wax. Use a cloth to apply a thin layer, wait 15 minutes, then apply another layer. If you are expecting heavy use, go ahead and put on a 3rd layer. Buff the furniture after 15 to 30 minutes. The furniture will be ready for light use after 24 hours, but takes 2-4 weeks to fully cure.
Here’s the finished product:
Finally, let me save you $30-$40. You do NOT need a chalk paint brush or a wax brush. Regular paint brushes work great. For smaller pieces and details, you’ll want a smaller brush, like what you would find in the art section. Nor do you need a wax brush – you’ll probably end up using an old cloth to apply the wax.

Nice!!! Thanks for the tips about not needing chalk paint and wax brushes. We have a couple of projects waiting for us to do. I am happy to see your success! It makes me confident that I can give it a try.
Faith, if I can do this, so can you!